
In this detailed article, I will guide you through the process of creating an Azure Machine Learning Prompt Flow specifically tailored to asking questions using the Weaviate vector database. By leveraging the insights shared in our step-by-step tutorial, you will gain an in-depth understanding of how to seamlessly integrate the Weaviate database, which is set up in the informative guide Setting up Weaviate on Azure with Multi-Container App. This comprehensive tutorial will equip you with the knowledge and skills needed to harness the full potential of Azure Machine Learning Prompt Flow in conjunction with the Weaviate database, enabling you to take your AI application development to new heights.
In this article
Prerequisites
- If you don’t have an Azure subscription, create an Azure free account before you begin.
- Make sure the default data store in your Azure Machine Learning workspace is blob type.
- If you don’t have an existing Azure Machine Learning workspace you will can quickly create: Tutorial: Create workspace resources – Azure Machine Learning | Microsoft Learn
- Create and deploy and Azure OpenAI resource and chat model – How-to: Create and deploy an Azure OpenAI Service resource – Azure OpenAI | Microsoft Learn
- This article expects access to Weaviate or similar vector database, this can be set up in the informative guide Setting up Weaviate on Azure with Multi-Container App.
Set up Azure Prompt Flow Connections
The first items we will want to complete is to establish the connections to the LLM and vector database.
An Azure Machine Learning Prompt Flow Connection is a safe way to store and handle secret credentials, like keys, for using LLMs (Large Language Models) and external tools such as Azure Content Safety. This feature keeps sensitive information secure while allowing smooth integration with Azure services.
Connection to Azure OpenAI
To begin, go to the homepage of the prompt flow and choose the Connections tab. Connections are shared resources accessible to all workspace members. Click on the Create button and choose “Azure OpenAI” from the drop-down menu.

After clicking “Azure OpenAI” a panel will open up on the right side of the screen.

| Field | Value |
|---|---|
| Name | A meaningful name for your Prompt Flow connection |
| Provider | Defaults to Azure OpenAI |
| Subscription id | Select Azure Subscription with your Azure OpenAI resource. |
| Azure OpenAI Account Names | Select the Azure OpenAI resource in the selected Azure Subscription |
| API key | Paste in key for Azure OpenAI resource (see below) |
| API base | Paste in endpoint for Azure Open AI resource (see below) |
| API type | Defaults azure |
| API version | Use default |
The Azure OpenAI key and endpoint can be found in Azure OpenAI resources under Resource Management → Keys and Endpoint.

After filling in the necessary information, choose Save to make the connection.
Connection to OpenAI (optional)
If you prefer to use the OpenAI APIs instead of Azure OpenAI, you can find instructions on setting up a Prompt Flow connection to OpenAI in this article: Prompt Flow Connection to OpenAI
Custom Connection to Vector Database
Next, we will create a Custom Connection to our vector database. You can find the details for this connection in the article: Setting up Weaviate on Azure with Multi-Container App

After clicking “Custom” a panel will open up on the right side of the screen.

| Field | Value |
|---|---|
| Name | A meaningful name for your Prompt Flow connection |
| Provider | Defaults to Provider |
| url (key-value pair) | https://%5Bvector-db-web-app%5D.azurewebsites.net/ |
| api_key (key-value pair) | Key value located in AUTHENTICATION_APIKEY_ALLOWED_KEYS from Docker Compose file, |
After filling in the necessary information, choose Save to make the connection.
Create Q&A Prompt Flow
In the Flows tab on the prompt flow homepage, click Create to make your prompt flow. You can make a flow by copying the examples in the gallery.
Clone from sample
In this article, we will utilize the Q&A on Your Data sample; choose Clone to create a direct copy of the sample.

After you select the “Clone” option, you create and save a new workflow in a designated folder within your workspace file share storage. You can modify the folder name according to your preference in the right panel.

Adding Weaviate Python Client
In order to use Weaviate’s search features in our code, we need to include the Weaviate Python Client (v3) in the requirements.txt file. Add the following line to the requiement.txt:

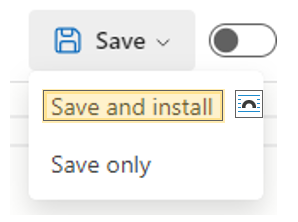
weaviate-client==3.24.1Select Save and install.
Start Automatic runtime
Before you can ‘run’ a prompt flow, you need to have a runtime set up. A runtime provides the computing resources necessary for the application to run, including a Docker image with all the required packages. We will use the automatic runtime that can be used out of the box; Starting the automatic runtime takes a while.

Workflow Clean-up
For this article, we will remove unused embedding node and vector index lookup node from the workflow as vectors are managed by the Weaviate module text2vec-transformers. This module was specified when setting-up Weaviate in Setting up Weaviate on Azure with Multi-Container App.
First, Delete the node “embed_the_question” to remove it from the workflow.

Then Delete the node “search_question_from_indexed_docs” to remove it from the workflow.

Create Python Search Node
With the embedding nodes removed we will now be adding and updating Python nodes to search our vector database.
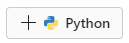
Create a new Python node for the Vector DB search, called “vectordb_search”.

Utilize the code below to do a Vector Search using the Weaviate database with the given endpoint and key set up in the custom connection.
from promptflow import tool
#import Custom Connection
from promptflow.connections import CustomConnection
#import Weaviate Python Client
import weaviate

@tool
def vectordb_search(query: str,con: CustomConnection, distance: float) -> str:
  client = weaviate.Client(
    url=con.url,
    auth_client_secret=weaviate.AuthApiKey(api_key=con.api_key),
  )


  results = []
  # Search the Vector Database using input  question (query)
  response = (
    client.query
    .get("Page", ["chapter", "body", "pageNumber", "inBook{ ... on Book{title}}"])
    .with_near_text({
        "concepts": [query],
        "distance": distance,
    })
    .with_limit(4)
    .with_additional(["id", "distance"])
    .do()
  )

  #results will contain a JSON array of the content and source details
  for page in response['data']['Get']['Page']:
    results.append({'id': page['_additional']['id'],
                    'title': page['inBook'][0]['title'], 'chapter': page['chapter'],'content':page['body'], 'page':page['pageNumber']})


  return results
We use promptflow.connections import CustomConnection to connect to the endpoint and api key set up in the custom connection we saved earlier.
I recommend saving your Flow often by clicking “Save” on the top right.

After you have saved your Flow, click Validate and Parse input on your Python node. Once validation is complete, you will be able to enter the inputs for the node, as shown below.

Update Generate Prompt Context
Next, we will modify the code in the Python node “generate_prompt_context” to match our source data.
from typing import List
from promptflow import tool
from promptflow_vectordb.core.contracts import SearchResultEntity


@tool
def generate_prompt_context(search_result: List[dict]) -> str:
    def format_doc(doc: dict):
        return f"Content: {doc['Content']}\nSource: {doc['Source']}"

    SOURCE_KEY = "source"
    URL_KEY = "url"

    retrieved_docs = []
    for item in search_result:

        content = item["content"]
        source = f"{item['title']} - page.{item['page']}"

        retrieved_docs.append({
            "Content": content,
            "Source": source
        })

    doc_string = "\n\n".join([format_doc(doc) for doc in retrieved_docs])

    return doc_string
Again, save your Flow then Validate and Parse input. Once validation is complete, you will be able to enter the inputs for the node, as shown below.

Finishing Touches
Update LLM Node to use OpenAI Connection
A final step is to update the LLM node “answer_the_question_with_context” to use the LLM connection (Azure OpenAI or OpenAI) created during Setting up Prompt Flow Connections.
To update the LLM node with the connection, follow these steps:
- Select the connection from the dropdown.
- Then choose the ‘gpt35turbo’ model for deployment_name.
- Finally, select “text” as the response_format.

Update Input to a Meaningful Question
We will want to update the question in the Input node to a value

If you have done the steps as described, your Flow Graph should look like this:

Click Run on the top right to start to workflow.

Once the run is done, you’ll have an answer to your question based on the data in your vector database. The results are shown below.
[
    0: {
        "system_metrics": {
            "completion_tokens": 41
    "duration": 1.080258
    "prompt_tokens": 2160
    "total_tokens": 2201
        }
    "output": "Supersonic combustion is a type of combustion that occurs at supersonic speeds. It is used in ramjet engines for high-speed aircraft and missiles. (Source: Rocket Propulsion Elements - page.1)"
    }
]Congratulations, you have just created a Q&A Prompt Flow using data pulled from a vector search with Weaviate!

Leave a Reply