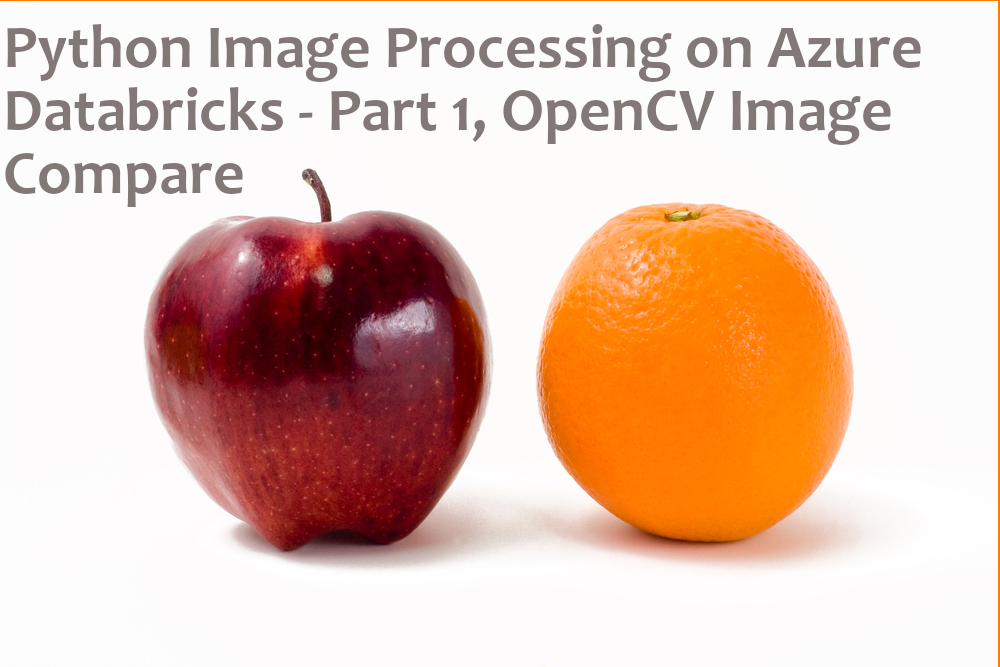
In this article, we will delve into the fascinating intersection of Azure Databricks and Python OpenCV, exploring how they can be utilized to compare image SSIM scores. The combination of these powerful tools allows for an in-depth analysis of images, leveraging the advanced capabilities of Azure Databricks alongside the rich functionality offered by Python OpenCV. Through this exploration, we aim to provide a comprehensive understanding of the processes and methodologies involved in comparing image SSIM scores, shedding light on the intricacies of image analysis in a dynamic and efficient manner. Stay tuned as we embark on this insightful journey into the world of image comparison using Azure Databricks and Python OpenCV!
I have been working with Azure Databricks the past few months and am having more fun than I probably should admit online. The collaborative notebooks are awesome, they are the best of Zeppelin and Jupyter combined into one cohesive experience. The simplicity of using jobs makes scheduling and reoccurring runs a breeze. Performance is fast; processing 500 GB.. no problem, feature engineering large data sets.. go for it. With auto-scaling and auto-terminating of clusters one can accommodate truly big data and only use the compute power needed when it is needed.
For these reasons, and others, I am finding it hard not to work in Azure Databricks.
Why do Image Comparison on Azure Databricks
I need to compare images – easy right, let’s just run a simple script locally in Python and call it done, well hold on, that is not as fun of a blog article.. and there is more to it. Ideally the complete solution should be able to automatically process ‘n’ number of base images against images pulled from various web sites and record visual differences, as well as, text differences from the images.. Ah ha, now you are interested. (maybe a little?)
Azure Databricks fits perfectly for the following reasons: 1) it scales, 2) can schedule my scripts 3) simplify library management 4) integrates with various Azure storage options.
Before we start, let’s break this giant ball of fun into bite size parts to help you the reader consume and me the writer manage this post (if I am being honest I am being selfish here and breaking this up mostly for me).
Here is how I have this entire solution broken out, this is part 1 (as appropriately stated in the title)
- Part 1 – Image Comparison
- Part 2 – Image Search
- Part 3 – Text Recognition
Let’s Get Started – Set-Up Azure Databricks Cluster
I am going to assume, which has never worked well for me, that if you are reading this you have some understanding of Microsoft Azure. If not you can always start at – What is azure.
Create Azure Databricks Resource
Log in to the Azure Portal.
You can add a new resource from the top left, or if you are in a Resource Group there is an Add button towards the top.

In the resource search bar start typing databricks. Then select Azure Databricks.

Clicking Create on the Azure Databricks Service resource page will open the create resource blade.
Azure Databricks needs a workspace name, subscription resource group, location and pricing tier. My location is Central US as this is where I am located and where my data is stored in Azure as well. Yours may very well be different.
The standard pricing tier is all we need for this project. If you wanted to implement security then check out the premium tier.

After clicking create, and waiting about 1-2 minutes, you should have the Azure Databricks Service resource available in your defined resource group.
Create Azure Databricks Cluster
Clicking the Azure Databricks Service resource takes you into the resource blade. Here there is some great documentation to help you gain proficiency with Azure Databricks. Click the Launch Workspace button to take you into the workspace.

After a few seconds of authenticating, you will see the workspace landing page. the left navigation bar lets you move to clusters, jobs, databases, etc. The center of the screen gives you links to create new items, review documentation and list your most recent documents.

Right now we can’t really do anything without a cluster, so let’s create one. You can click the Cluster link under New of click Clusters in the navigation bar.
Yup, no clusters. Click the Create Cluster button to add our first cluster.

There seems to be a lot going on here, so let’s simplify.
Custer Type: Let’s use Standard so we can utilize auto terminate. We would consider Serverless Pool if we had multiple users accessing the same cluster as it help prevent contention while sharing resources. There are a few other benefits, but for this project, standards is a good pick.
Cluster Name: this is up to you
Databricks Runtime: 4.0 Apache Spark 2.3
Python Version: 3
Driver Type: Same as worker
Worker Type: Up to you, however, Standard_DS3_v2 works fine for this project
Auto Terminate: I normally use 60 for my personal projects. If I have not touched it in one hour, I probably am not going to for a while – shutdown the compute. This is probably not ideal in a profession/work environment, but has been effective for personal project on my subscription.

Once filled out, clicking create will create and start your cluster. This may take a few minutes to create the VMs and network resources. Try not to stare directly at it, it will not speed-up knowing you are watching, in-fact I believe it is the opposite.

Add Python Libraries to Cluster
Once you cluster is running we will want to add a couple of python libraries for this project. Being able to do this so easy is awesome! I have struggle with other solutions managing R,Python,Jar dependencies. Bring it on Data Science team, go ahead and use the 10 variant of R dplyr, tidy or whatever.
We will be adding only two libraries:
- scikit-image
- opencv-python
Click on the Azure Databricks icon to go back to the main page.

Then look under New and click Library.

Change the Language to ‘Upload Python Egg or PyPi’ then under PyPi Name type sckit-image and click Install Library.

Check Attach automatically to all clusters, if you want this library to always attach itself to the current and new clusters.

This should attach without error. If not add a nice comment or send a nice email, but it really should attach fine. You can specify the version if so desired, but for simplicity we’ll just grab the latest.
Add OpenCV-python following the same steps.

Image Compare Code
Now for the fun, writing some code and comparing images. First we need to create a new notebook.
Go back to the main landing page and under New click Notebook. Give the notebook a name, choose Python as the language and select your running cluster to attach to.

 The code, which can be imported directly into Azure Databricks, and images are available on GitHub.
Each code snippet represents a Notebook cell and can be ran individually. You can copy paste each snippet into a cell or import the Image Compare.py file from GitHub into your Azure Databricks workspace.
This code will use the two packages we attached to the cluster, scikit-image (skimage) and Opencv-python (cv2); plus matplotlib and numpy.
from skimage.measure import compare_ssim
import cv2
import numpy as np
import matplotlib.pyplot as plt
Mixing Languages
The Azure Databricks Notebooks allows us to mix programming languages by specifying a magic command at the beginning of a cell (%python, %md, %scala) Read more on mixing languages.
The use of %md allows for the utilization of markdown within the Notebook cell.
Mount Azure Storage
https://docs.azuredatabricks.net/spark/latest/data-sources/azure/azure-storage.html
Using %fs we can create an Azure Databricks directory for mounting the images, if it does not already exist.
%fs
# run if dir does not exist
# mkdirs "/mnt/images/"
You will need to update the connection with your Azure Storage Account information: Azure Storage.
Please visit here for steps on creating an Azure Storage Account.
dbutils.fs.mount(source = "wasbs://@.blob.core.windows.net",mount_point = "/mnt/images/",extra_configs = {"fs.azure.account.key..blob.core.windows.net": "})"})IMAGES_FOLDER = "/dbfs/mnt/images/"Reuse Functions
Crop Function – Removes white space to more effectively scale images.
def crop_image(img):
    #prevent changes to original image
    img_o = img.copy()

    gray = cv2.cvtColor(img_o, cv2.COLOR_BGR2GRAY) # convert to grayscale

    # threshold
    retval, thresh_gray = cv2.threshold(gray, thresh=200, maxval=256, type=cv2.THRESH_BINARY)

    #find black pixels
    points = np.argwhere(thresh_gray==0)
    #store in x, y coords
    points = np.fliplr(points)

    x, y, w, h = cv2.boundingRect(points)

    #expand box and do not allow negative (image may be x,y 0,0)
    x, y, w, h = x-10 if x-10>0 else 0, y-10 if y-10>0 else 0,w+20, h+20
    print(x,y,w,h)

    # create a cropped region of the gray image
    crop = img[y:y+h, x:x+w]

    return crop
Plot Image – Reusable code snippet for code clarity. The site argument is used in part 2 to display the site the image was retrieved from.
def plot_img(figtitle,subtitle,img1,img2,site):

  #create figure with std size
  fig = plt.figure(figtitle, figsize=(10, 5))

  plt.suptitle(subtitle,fontsize=24)

  ax = fig.add_subplot(1, 2, 1)
  # base is hardcoded for img1
  ax.set_title("Base",fontsize=12)
  plt.imshow(img1)
  plt.axis("off")

  ax = fig.add_subplot(1, 2, 2)
  # site is used in site iteration
  ax.set_title(site,fontsize=12)
  plt.imshow(img2)
  plt.axis("off")

  display(plt.show())
In part 1 we will just hardcore the images, both the base and compare.
img1 = IMAGES_FOLDER  + "PAM_Original_6_OZ_ST.jpg"
orig_img =  cv2.imread(img1)

img2 = IMAGES_FOLDER  + "PAM_Original_6_OZ.jpg"
comp_img = cv2.imread(img2)
I decided to use PAM as I have doing more cooking now that the warmer months are in. PAM is great for cooking and great for image compare as there are so many types of the product (coconut oil PAM).
plot_img("Image Compare Orig" ,"Original Images",cv2.cvtColor(orig_img, cv2.COLOR_BGR2RGB),cv2.cvtColor(comp_img, cv2.COLOR_BGR2RGB),"Compare")
Oddly enough the PAM I use is also for astronaut ninja cats (very hard to find in stores), other than that, the images are identical.
Crop to Images – Remove white space
The computation of SSIM scores is susceptible to bias from whitespace.
print(orig_img.shape)
print(comp_img.shape)

orig_img = crop_image(orig_img)
comp_img = crop_image(comp_img)

print(orig_img.shape)
print(comp_img.shape)
(2500, 720, 3) (2500, 720, 3) 0 0 740 2519 0 0 740 2519 (2500, 720, 3) (2500, 720, 3)
Resize Images for scoring
Size to smallest image
#identify smallest image size
small = min(orig_img.shape,comp_img.shape)[:2][::-1]
print(small)
(720, 2500)
#resize to smallest image
orig_img = cv2.resize(orig_img,dsize =small)
comp_img = cv2.resize(comp_img,small)

print(orig_img.shape)
print(comp_img.shape)
(2500, 720, 3) (2500, 720, 3)
When comparing images that are not the same file, cropping and scaling can help you achieve better results.
Generate Multichannel (full color) SSIM – Image Compare
SSIM Scores range from -1 to 1, with 1 indicating a “perfect match”
(score, diff) = compare_ssim(orig_img, comp_img, full=True,multichannel=True)

plot_img("Image Compare Multi","SSIM: %.2f" % (score),cv2.cvtColor(orig_img, cv2.COLOR_BGR2RGB),cv2.cvtColor(comp_img, cv2.COLOR_BGR2RGB),"Compare")
A multichannel SSIM of 0.98 indicates that these images are nearly identical.
Greyscale Image Compare – Normalize color difference
#create images for gray compare
gray1 = cv2.cvtColor(orig_img.copy(), cv2.COLOR_BGR2GRAY)
gray2 = cv2.cvtColor(comp_img.copy(), cv2.COLOR_BGR2GRAY)


(score, diff) = compare_ssim(gray1, gray2, full=True,multichannel=False,gaussian_weights=True)

plot_img("Image Compare Gray" ,"Gray SSIM: %.2f" % (score),cv2.cvtColor(gray1, cv2.COLOR_GRAY2BGR),cv2.cvtColor(gray2, cv2.COLOR_GRAY2BGR),"Compare")
Removing the multichannel does not significantly improve the SSIM, as there is really no difference with the images.
Not the Same Image
Let’s see how the same code looks if we compare two images that are slightly different. This time I am going to compare an 8 OZ to a 6 OZ PAM. And because the image sizes are not the same cropping and scaling are required from comparison.
img1 = IMAGES_FOLDER  + "PAM_Original_8_OZ.jpg"
orig_img =  cv2.imread(img1)

img2 = IMAGES_FOLDER  + "PAM_Original_6_OZ.jpg"
comp_img = cv2.imread(img2)
As evident from the images below, there are discernible differences.

Crop to Images – Remove whitespace
print(orig_img.shape)
print(comp_img.shape)

orig_img = crop_image(orig_img)
comp_img = crop_image(comp_img)

print(orig_img.shape)
print(comp_img.shape)
(3000, 3000, 3) (2500, 720, 3) 1116 0 767 3019 0 0 740 2519 (3000, 767, 3) (2500, 720, 3)
Resize Images for scoring
#identify smallest image size
small = min(orig_img.shape,comp_img.shape)[:2][::-1]
print(small)
(720, 2500)
#resize to smallest image
orig_img = cv2.resize(orig_img,dsize =small)
comp_img = cv2.resize(comp_img,small)

print(orig_img.shape)
print(comp_img.shape)
(2500, 720, 3) (2500, 720, 3)
Generate Multichannel (full color) SSIM – Image Compare
(score, diff) = compare_ssim(orig_img, comp_img, full=True,multichannel=True)

plot_img("Image Compare Multi","SSIM: %.2f" % (score),cv2.cvtColor(orig_img, cv2.COLOR_BGR2RGB),cv2.cvtColor(comp_img, cv2.COLOR_BGR2RGB),"Compare")
A Structural Similarity Index (SSIM) of 0.44 was observed, indicating a noticeable difference, although it falls short of optimal.
Greyscale Image Compare – Normalize color difference
#create images for gray compare
gray1 = cv2.cvtColor(orig_img.copy(), cv2.COLOR_BGR2GRAY)
gray2 = cv2.cvtColor(comp_img.copy(), cv2.COLOR_BGR2GRAY)


(score, diff) = compare_ssim(gray1, gray2, full=True,multichannel=False,gaussian_weights=True)

plot_img("Image Compare Gray" ,"Gray SSIM: %.2f" % (score),cv2.cvtColor(gray1, cv2.COLOR_GRAY2BGR),cv2.cvtColor(gray2, cv2.COLOR_GRAY2BGR),"Compare")
Converting to greyscale can be a valuable technique when aiming to enhance the structural similarity (SSIM) of an image. By removing color information and working solely with the brightness values, subtle details and structural components can be emphasized, leading to a slight improvement in the SSIM metric. This method is often employed in various image processing applications to better highlight textures and edges, thereby contributing to overall visual quality. Experimenting with different methods of color conversion and fine-tuning the process can further optimize the SSIM, ultimately resulting in an image with improved perceptual quality.
Finally, unmount the Azure Databricks directory when you have completed all the necessary tasks.
dbutils.fs.unmount("dbfs:/mnt/images/")When I first found the 8 OZ image, it was labeled as 6 OZ. In Part 2, we will utilize Bing Search to retrieve images from the web, rather than solely relying on static images. In Part 3, we will employ Azure Cognitive Services to extract text from the images. This will enable us to compare an 8 OZ to a 6 OZ.


Leave a Reply