
The Internet of Things (IoT) powers numerous sectors, from professional services like freight management and weather tracking to home automation for managing heating, cooling, lighting, and security. Starting IoT projects with low costs is both easy and enjoyable. This article will outline how to track an affordable IoT device, NodeMCU, using Azure Event Hubs.
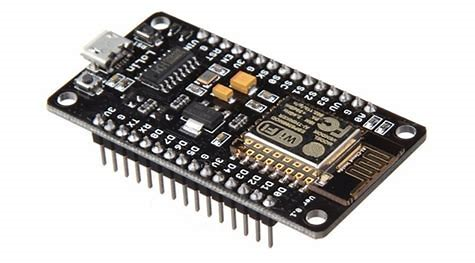
When I think of an IoT hobby project I think of Raspberry Pi and Arduino, which are fantastic devices, but sometimes I have a need for a smaller device footprint. For these projects I use the NodeMCU 8266 (HiLetgo makes the one I use in this project), which is about the size of a 9 Volt battery, costs around $8-$10 USD, has WiFi. and you can use the Ardunio IDE to push code to it. What it can do for the cost and size is awesome!!
Getting Started
Let’s do a simple project, the ‘Hello World’ of IoT and attach the NodeMCU to an Adafruit Si7021 temperature sensor. To keep things simple, fun and practical, let’s stream temperature and humidity to an Azure Event Hub using HTTPS. Wait.. why not use the Azure IoT SDK for C (you ask). Well, because there will be devices that you may come across that don’t have the capability to use and SDK and understanding the HTTP connection could prove useful. Plus I wanted to see how much fun it could be.
Creating Azure Event Hubs
I am going to take the easy path here and let you use this amazing article to get set-up with Azure Event Hubs ( I would have wrote the same thing anyway.. mostly)
Set-up Arduino IDE
Next we will want to download the Arduino IDE.
Once the IDE is ready, we need to add the esp8266 board to the IDE. Go to File -> Preferences and add the following URL to ‘Additional Boards Manager URLs’:
http://arduino.esp8266.com/stable/package_esp8266com_index.json

Then add the board by going to Tools -> Board -> Board Manager and search for ‘esp’. Install esp8266 by ESP8266 Community.

Building the Device:
This IoT device is fairly straightforward to build. Connect the temperature sensor to the NodeMCU…. done..
Here is a picture showing the NodeMCU connected to the sensor on a breadboard.

Here is how you wire it up. Below I listed the connections in a table to help with the hook-up.

| NodeMCU | Adafruit Si7021 |
|---|---|
| D1 | SDA |
| D2 | SCL |
| 3v3 | VIN |
| GND | GND |
| – | 3Vo |
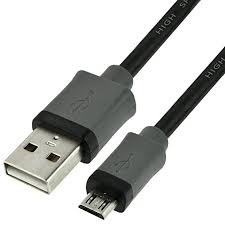
** Don’t forget the micro USB for connecting you4 NodeMCU to your computer.
C# Code for Token Generation:
With your connections made we are almost ready to send some data to the cloud. Since these calls are going to use HTTP, we have to generate a token to pass to the HTTP end point for authentication. If you use the Azure IoT C SDK, all you have to provide is your hub key, but here we are not using the SDK.
The C# code below will generate a URL encode 24 hour access SAS token for authorization with Event Hub. The code has placeholders for your hub namespace, key name and key.
You can modify it as you see fit. I am considering adding this to the device itself and will update this post if/when I accomplish that task.
using System;
using System.Text;
using System.Globalization;
using System.Security.Cryptography;
using System.Web;

namespace SasTokenGen
{
 class Program
 {

/// <summary>
 /// Code for generating of SAS token for authorization with Event Hub, Service Bus
 /// </summary>
 /// <param name="resourceUri" ></param>
 /// <param name="keyName"></param>
 /// <param name="key"></param>
 /// <returns>generated SAS token</returns>
 private static string createToken(string resourceUri, string keyName, string key)
 {
 TimeSpan sinceEpoch = DateTime.UtcNow - new DateTime(1970, 1, 1);
 var expiry = Convert.ToString((int)sinceEpoch.TotalSeconds + 86400); //add seconds to expire, 86400 = 24 hours
 string stringToSign = HttpUtility.UrlEncode(resourceUri) + "\n" + expiry;
 HMACSHA256 hmac = new HMACSHA256(Encoding.UTF8.GetBytes(key));

var signature = Convert.ToBase64String(hmac.ComputeHash(Encoding.UTF8.GetBytes(stringToSign)));
 var sasToken = String.Format(CultureInfo.InvariantCulture,
 "SharedAccessSignature sr={0}&sig={1}&se={2}&skn={3}",
 HttpUtility.UrlEncode(resourceUri), HttpUtility.UrlEncode(signature), expiry, keyName);

return sasToken;
 }


static void Main(string[] args)
 {
 //RootManageSharedAccessKey is the default access everything hub namespace key name, fine for
 // this demo project, may not be the key you will want to implement in a production environment.
 var sasToken = createToken("https://<hub_namespace>.servicebus.windows.net/<hub>", "RootManageSharedAccessKey", "<key>");

Console.Out.Write(sasToken);
 Console.In.ReadLine();
 }

}
}
Arduino Code:
I did not think I would code C after undergrad, I wish I would have kept my C books as they would have come in handy. But here we are, coding C# and C in the same post… good times.
Add Libraries
If we want to code to work we will have to add the dependent libraries .
Go to Sketch -> Include Libraries -> Manage Libraries then search for Adafruit Si7021.. It should appear in the list (ping me if not as I don’t believe there is a dependent step to this step).
Install it the library

We will need to do the same for ESP8266WiFi, which also has the WiFiClientSecure library.
Let’s write some code..
Include the libraries and set-up some global variables.
Don’t forget to replace <hub_namespace> and <hub> with your information.
#include <ESP8266WiFi.h>
#include <Wire.h>
#include "Adafruit_Si7021.h"
#include <WiFiClientSecure.h>

double tmp = 0.0;
double hum = 0.0;
Adafruit_Si7021 sensor = Adafruit_Si7021();
int status = WL_IDLE_STATUS;

String server = "<hub_namespace>.servicebus.windows.net";
String hubpath = "/<hub>/messages";

WiFiClientSecure client;
Put your initialization code in the setup function. Change the WiFi placeholders to use your wireless information.
void setup() {

 //setup code, to run once:
 delay(1000);
 //(int sda, int scl)
 Wire.begin(5, 4);
 Serial.begin(9600);


// wait for serial port to open
 while (!Serial) {
 delay(10);
 }

if(WiFi.status() == WL_NO_SHIELD)
 {
 Serial.println("Wifi shield not present");
 while(true);
 }

//Connect to WiFi
 status = WiFi.begin(<SSID>,"<WiFi_PAssword>");

while(WiFi.status() != WL_CONNECTED)
 {
 delay(500);
 Serial.println("wait...");
 }


// Connect to sensor
 Serial.println("Si7021 test!");

if (!sensor.begin()) {
 Serial.println("Did not find Si7021 sensor!");
 while (true);
 }
}
The code below executes every 5 minutes (delay(300000);). First it retrieves the sensor information and puts it into a JSON formatted string (this is a line that can be cleaned-up).
The system prints out the information to the serial port for debugging, ensuring everything proceeds as expected.
Next the code connects to the server via HTTPS and creates the HTTP POST headers (key value pairs). The authorization value is the output of the C# application
void loop() {

#Convert to fahrenheit
 tmp = sensor.readTemperature()*9/5+32;
 hum = sensor.readHumidity();
 String postData = "{\"deviceid\":1,\"location\":\"office\",\"Temperature\":" + String(tmp) + ",\"Humidity\":"+String(hum)+"}";


 Serial.print("Humidity: "); Serial.print(hum, 2);
 Serial.println("\tTemperature: "); Serial.print( tmp, 2);

 Serial.println(postData);


 if(client.connect(server,443)){
 Serial.print("connected\n");
 client.println("POST " + hubpath + " HTTP/1.1");
 client.print("authorization: ");
 client.println(<Paste_C#_SAS_Token_Output>);
 client.print("content-type: ");
 client.println("text/plain");
 client.print("host: ");
 client.println(server);
 client.print("content-length: ");
 client.println(postData.length());
 client.println();
 client.print(postData);
 client.println();


 }
 else
 {
 Serial.print("failed connect");
 }

String response = "";

delay(5);

response += client.readString();

 Serial.println();
 Serial.print("Response code: ");
 Serial.println(response);

 //wait 5 minutes
 delay(300000);
}
Below are the settings that have working for me, in regards to the board, upload speed, etc. It took some troubleshooting to find the settings that would push the code without failing.
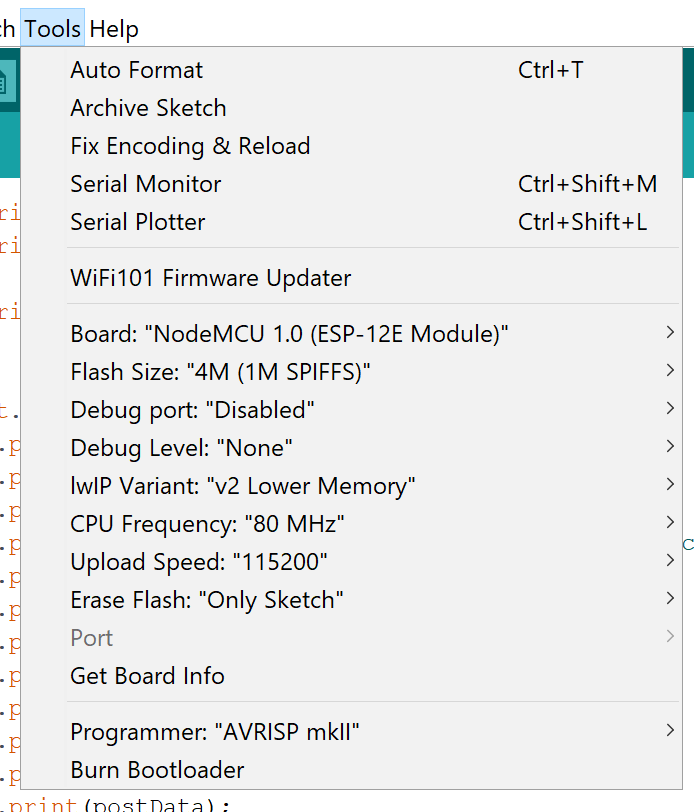
Once you finish the code and settings, click the Upload button at the top left of the Arduino IDE to push the code to NodeMCU.

Launch the Serial Monitor (Tools -> Serial Monitor) and set the baud to 9600. If all goes perfectly then you should see the following:

Error 201 indicates an event message was created on the Azure Event Hub. Authentication issues are typically related to your SAS token, HTTP header formatting errors can be annoying – ensure your print() and println() match up with the code provided.
It Works!!
It works!!.. Right? We set-up Azure Event Hubs, installed the Arduino IDE with required dependencies, have the code to generate SAS tokens, built our IoT device and uploaded our code to the device that is configured to our WiFi and Event Hub setting.. That should do it.. If you hit a major roadblock shoot over a comments, let’s figure it out.
If you are getting a 201 message in the serial console then messages are coming in to your even hub; you can view the hub metrics to see them. You should have requests and messages coming in every 5 minutes.

What is Next
Congratulations! You are streaming data to Azure Event Hubs with your IoT device, you can now show all of your friends the metrics charts on the Azure portal.. Not good enough, you want to actually access the data? Okay, next time we will grab the data for storage and/or real-time processing. Here are possible options for processing our data in our Event Hub:
- Spark Streaming
- Azure Databricks
- Azure HDInsight
- Azure Stream Analytics
If communication with your IoT device is required, Azure IoT Hub provides the necessary functionality. The NodeMCU stands as a promising device for managing household items.

Leave a Reply