
In this tutorial, we’ll deploy the AI Travel Agent, built with LangChain and Azure Cosmos DB for MongoDB, as outlined in the article Empower your AI Agent with Azure Cosmos DB. Using Azure App Service, we’ll streamline hosting for web apps, REST APIs, and mobile backends while ensuring scalability, security, and multi-language support.
We’ll walk through deploying a Python FastAPI backend and a ReactJS front-end on Azure App Service, leveraging GitHub Actions for continuous integration. Additionally, we’ll set up connections to the OpenAI API and Azure Cosmos DB for MongoDB vCore, enabling a fully functional AI-powered solution.
If you’re seeking a deployment example that includes managed identities, private endpoints, and firewall restrictions, be sure to check out my article: The Perfect AI Team: Azure Cosmos DB and Azure App Service

In this article
- Prerequisites
- What is Azure App Service?
- Fork AI Travel Agent GitHub Repository
- Enable Access to Azure Cosmos DB for MongoDB vCore
- Setting Up Azure App Service for LLM Web Application Deployment
- Setting Up an Azure Web App for Deploying FastAPI
- Setting Up an Azure Web App for Deploying ReactJS
Prerequisites
- If you don’t have an Azure subscription, create an Azure free account before you begin.
- If you don’t have a GitHub account, you can create one for free.
- Setup account for OpenAI API – Overview – OpenAI API
- Create an Azure Cosmos DB for MongoDB vCore by following this QuickStart.
- You will need to load the travel documents into Azure Cosmos DB for MongoDB
What is Azure App Service?
Azure App Service is an HTTP-based service for hosting web applications, REST APIs, and mobile back ends. It supports various programming languages like .NET, .NET Core, Java, Node.js, PHP, and Python. Applications run and scale effortlessly on both Windows and Linux environments, integrating Microsoft Azure features such as security, load balancing, autoscaling, and automated management. App Service also offers DevOps capabilities like continuous deployment, package management, staging environments, custom domains, and TLS/SSL certificates. You pay for the compute resources based on your chosen App Service plan.
Key Features of Azure App Service
Versatile Development and Deployment: Supports multiple languages and frameworks including ASP.NET, Java, Node.js, PHP, Python, and PowerShell. Offers containerization and Docker support for hosting custom containers on Windows or Linux.
Scalable and Managed Environment: Provides a managed environment with automatic OS and framework maintenance. Enables DevOps optimization with continuous integration and deployment. Scales applications globally with high availability and includes serverless code execution for on-demand tasks.
Robust Security and Connectivity: Ensures security and compliance with ISO, SOC, and PCI standards. Features built-in support for authentication providers and secure connections to SaaS platforms and on-premises data. Offers a wide range of application templates and API/mobile features for seamless development and deployment.
Fork AI Travel Agent GitHub Repository

This tutorial provides a walkthrough for deploying a pre-existing AI Travel Agent LLM application utilizing GitHub Actions. To get started, please proceed by forking the GitHub repository for the “AI Travel Agent Powered by Azure Cosmos DB and LangChain”, available at this location.
Enable Access to Azure Cosmos DB for MongoDB vCore
We will not currently address private endpoint configuration, as that topic will be covered in the future. Instead, we will be granting access to the Azure services to allow our API Azure Web App to access to the data. You will need to enable ‘Allow public access from Azure services’ for your Azure Cosmos DB for MongoDB vCore Service.

Setting Up Azure App Service for LLM Web Application Deployment
Next, we shall proceed to establish an Azure App Service Plan for the deployment of our ReactJS web application and Python FastAPI.
Create a new resource and search for App Service Plan.

Although you can make use of the Free F1 pricing, and I demonstrate the use of this plan in this tutorial, the performance of running the API and ReactJS application will be enhanced when running on a basic service plan (B1). Furthermore, you will not be confined to the 60 CPU minutes per day limit, which is the case with the Free F1 plan.
Please select your subscription, resource group, and region, and proceed to click on Review + create.
- Fill in Project Details
- Fill in App Service Plan Details
- Select Linux as the Operating System
- Choose your closest region
- Select the Free F1 Pricing Tier
- Click on Review + create

You can scale your App Service plan up or down anytime by changing the pricing tier. Start with a Free plan for testing and scale up as needed for more features, such as a Shared tier for custom DNS or a Basic tier for TLS binding.
Setting Up an Azure Web App for Deploying FastAPI
Once the App Service has been established, the subsequent step will involve setting up an Azure Web App to deploy our Travel Agent API, which consists of the Python FastAPI application. The Azure Web App uses the previously created App Service plan to determine its location, features, and capacity, ensuring consistent performance and scalability according to the plan’s specifications.
Create a new resource and search for Web App.
- Fill in Project Details
- Fill in Insance Details
- Select Code under Publish
- Choose Python 3.11 as the Runtime stack
- Choose Linux as the Operating System
- Choose your closest region
- Select the App Service Plan created above under Linux Plan
- Click Review + create

Adding Environment Variables
The AI Travel Agent API leverages the OpenAI API and Azure Cosmos DB for MongoDB. To ensure smooth connectivity and functionality, we need to configure the necessary environment variables for our API. These variables will allow our application to securely connect to the OpenAI API for conversational AI and natural language processing capabilities, and Azure Cosmos DB for vector search, efficient data storage, and retrieval.
Using the Azure portal, we have the capability to modify the Environment variables of our recently created Azure Web App.
- Select Environment variables under Settings
- Ensure the App settings tab is selected
- Add the following environment variables the click Apply
| Environment Variable | Description |
|---|---|
| OPENAI_API_KEY | The key to connect to OpenAI API. If you do not possess an API key for Open AI, you can proceed by following the guidelines outlined here. |
| MONGO_CONNECTION_STRING | The Connection string for Azure Cosmos DB for MongoDB vCore – demonstrated here. |

Modifying Start Up Command to Accommodate FastAPI Framework
We will transition the gunicorn worker class to uvicorn in order to fully capitalize on the capabilities of our Python FastAPI. This change will allow us to utilize the ASGI support offered by uvicorn, consequently enhancing the performance and scalability of our application. The configurations for gunicorn are defined in the file ‘gunicorn_config.py’.
- Select Configuration under Setting
- Select the General settings tab
- Paste the following Startup Command:
gunicorn --config gunicorn_config.py app:app
4. Click Save
Continuous Integration with GitHub Actions
Now that we have created both the Azure App Service and Azure Web App and finished the application configurations, we can proceed to set up our code deployment using GitHub Actions. The first step is to integrate our deployment with GitHub using the Azure Web App Deployment center.
- Select Deployment Center
- Select GitHub as the deployment Source
- Sign-in to your GitHub account.
- Select your GitHub Organization
- Choose forked Repository: Travel-AI-Agent-React-FastAPI-and-Cosmos-DB-Vector-Store
- Select the main Branch
- Click Save


Clicking the “Save” button will initiate the creation of a new directory within your forked repository, named ‘.github/workflows’, and will proceed to add a workflow file named after your Azure Web App (‘main_app-agent-api-test-centralus.yml’). It will be necessary to make adjustments to the generated file in order to package and deploy only the API code from our Travel Agent repository.
Utilize the provided code from below to modify your workflow so that it is triggered exclusively by changes to the API (api directory), and to ensure that it solely builds and deploys the API python code. Please be aware that your file name will match the name of your Azure Web App and more than likely differ from the one demonstrated in this tutorial (main_app-agent-api-test-centralus.yml)
main_app-agent-api-test-centralus.yml
# Docs for the Azure Web Apps Deploy action: https://github.com/Azure/webapps-deploy
# More GitHub Actions for Azure: https://github.com/Azure/actions
# More info on Python, GitHub Actions, and Azure App Service: https://aka.ms/python-webapps-actions

name: Build and deploy Python app to Azure Web App - app-agent-api-test-centralus

on:
  push:
    branches:
      - main
    paths:
      - api/**
  workflow_dispatch:

jobs:
  build:
    defaults:
      run:
        working-directory: api
    runs-on: ubuntu-latest

    steps:
      - uses: actions/checkout@v4

      - name: Set up Python version
        uses: actions/setup-python@v1
        with:
          python-version: '3.11'

      - name: Create and start virtual environment
        run: |
          python -m venv venv
          source venv/bin/activate

      - name: Install dependencies
        run: pip install -r requirements.txt

      # Optional: Add step to run tests here (PyTest, Django test suites, etc.)

      - name: Zip artifact for deployment
        run: zip release.zip ./* -r

      - name: Upload artifact for deployment jobs
        uses: actions/upload-artifact@v3
        with:
          name: python-app
          path: |
            api/
            release.zip
            !venv/

  deploy:
    defaults:
        run:
          working-directory: api
    runs-on: ubuntu-latest
    needs: build
    environment:
      name: 'Production'
      url: ${{ steps.deploy-to-webapp.outputs.webapp-url }}
    permissions:
      id-token: write #This is required for requesting the JWT

    steps:
      - name: Download artifact from build job
        uses: actions/download-artifact@v3
        with:
          name: python-app

      - name: Unzip artifact for deployment
        run: unzip -o release.zip


      - name: Login to Azure
        uses: azure/login@v1
        with:
          client-id: ${{ secrets.AZUREAPPSERVICE_CLIENTID_ }}
          tenant-id: ${{ secrets.AZUREAPPSERVICE_TENANTID_ }}
          subscription-id: ${{ secrets.AZUREAPPSERVICE_ }}

      - name: 'Deploy to Azure Web App'
        uses: azure/webapps-deploy@v2
        id: deploy-to-webapp
        with:
          app-name: 'app-agent-api-test-centralus'
          package: api
Use your GitHub secrets for:
- client-id: ${{ secrets.AZUREAPPSERVICE_CLIENTID_ }}
- tenant-id: ${{ secrets.AZUREAPPSERVICE_TENANTID_ }}
- subscription-id: ${{ secrets.AZUREAPPSERVICE_ }}
Now that our GitHub workflow has been updated, we are able to deploy to our Azure Web App. Initially, it is necessary to commit the changes to the workflow file. Please note that this action will not trigger the workflow, as only code modifications made to the API directory will trigger the workflow. Subsequently, it will be necessary to run the workflow.
For the purpose of this tutorial, we will initiate our workflow directly from our Azure Web App.
- Navigate to Deployment Center under Deployment
- Click Sync on the top.

3. Select Ok to redeploy
Navigate back to the GitHub Actions section within your forked repository, where you will find your deployment process in progress.
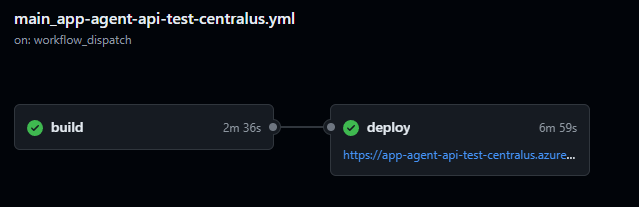
Verifying FastAPI Deployment on Azure Web App
Once the GitHub workflow has been completed, we can verify the deployment by accessing the Azure Web App endpoint. To do so, simply click on the default domain located in the Overview section.

A successful deployment will result in the message:
"running"
View the Swagger documentation by adding ‘/docs’ to your URL. For instance, you can access the documentation at ‘app-agent-api-test-centralus.azurewebsites.net/docs’.

Click Try It out for /agent/agent_chat.

example parameter
{
  "input": "I want to take a relaxing vacation.",
  "session_id": "0505a645526f4d68a3603ef01efaab19"
}
The initial execution will result in a recommendation for the Tranquil Breeze Cruise and the Fantasy Seas Adventure Cruise as they are anticipated to be the most ‘relaxing’ cruises available through the vector search.
Setting Up an Azure Web App for Deploying ReactJS
Next, in order to complete the process, we will walk through similar steps to create another Azure Web App to deploy the ReactJS Web Front-end. This front-end will serve as the client, consuming the API that we deployed in the previous steps. By leveraging the same Azure App Service that was created earlier in this tutorial, we ensure a seamless integration and management of both the back-end and front-end components.
Create a new Azure Web App resource.
- Fill in Project Details
- Fill in Instance Details
- Select Code under Publish
- Choose Node 18 LTS as the Runtime stack
- Choose Linux as the Operating System
- Choose your closest region
- Select the App Service Plan created above under Linux Plan
- Click Review + create

Modifying Start Up Command to NodeJS
We will employ a startup command to instruct the process manager to serve the ReactJS content from ‘/home/site/wwwroot’. This command will guarantee that the server is appropriately configured to handle requests for ReactJS and to execute the process in the foreground for debugging purposes.
- Select Configuration under Setting
- Select the General settings tab
- Paste the following Startup Command:
pm2 serve /home/site/wwwroot --spa --no-daemon4. Click Save:
Continuous Integration with GitHub Actions
Now that the configuration of the Web application is complete, we can proceed to establish our code deployment using GitHub Actions. We will follow the same steps as those completed earlier for our API web app. The initial step is to once again integrate our deployment with GitHub using the Azure Web App Deployment center.
- Select Deployment Center
- Select GitHub as the deployment Source
- Sign-in to your GitHub account.
- Select your GitHub Organization
- Choose forked Repository: Travel-AI-Agent-React-FastAPI-and-Cosmos-DB-Vector-Store
- Select the main Branch
- Select Add a new workflow file under Workflow options.
- Click Save
Clicking the “Save” button will initiate the creation of a new workflow file within ‘.github/workflows’, named after your Azure Web App (‘main_app-agent-web-test-centralus.yml’ as an example). Again, it will be necessary to make adjustments to the generated file in order to package and deploy only the ReactJS code from our Travel Agent repository.
Utilize the code provided below to adjust your workflow that it is exclusively triggered by changes to the web directory. Ensure that it only builds and deploys the ReactJS web application. Please note that the file name should correspond with the name of your Azure Web App and may differ from the one illustrated in this tutorial (main_app-agent-web-test-centralus.yml).
main_app-agent-web-test-centralus.yml
# Docs for the Azure Web Apps Deploy action: https://github.com/Azure/webapps-deploy
# More GitHub Actions for Azure: https://github.com/Azure/actions

name: Build and deploy Node.js app to Azure Web App - app-agent-web-test-centralus

on:
  push:
    branches:
      - main
    paths:
    - web/**
  workflow_dispatch:

jobs:
  build:
    defaults:
        run:
          working-directory: web
    runs-on: ubuntu-latest

    steps:
      - uses: actions/checkout@v4
      - name: Make envfile
        uses: SpicyPizza/create-envfile@v2.0
        with:
          envkey_DEBUG: false
          envkey_REACT_APP_API_HOST: "https://app-agent-api-test-centralus.azurewebsites.net"
          fail_on_empty: true
          directory: web/
          file_name: .env

      - name: Show files
        run: |
          ls -a

      - name: Set up Node.js version
        uses: actions/setup-node@v3
        with:
          node-version: '18.x'

      - name: npm install, build, and test
        run: |
          npm install
          npm run build --if-present
          npm run test:ci --if-present
        env:
          CI: ""

      - name: Zip artifact for deployment
        run: zip release.zip ./* -r

      - name: Upload artifact for deployment job
        uses: actions/upload-artifact@v3
        with:
          name: node-app
          path: |
            web/release.zip
            !web/node_modules/

  deploy:
    runs-on: ubuntu-latest
    needs: build
    environment:
      name: 'Production'
      url: ${{ steps.deploy-to-webapp.outputs.webapp-url }}
    permissions:
      id-token: write #This is required for requesting the JWT

    steps:
      - name: Download artifact from build job
        uses: actions/download-artifact@v3
        with:
          name: node-app

      - name: Unzip artifact for deployment
        run: unzip -o release.zip

      - name: Login to Azure
        uses: azure/login@v1
        with:
          client-id: ${{ secrets.AZUREAPPSERVICE_CLIENTID_ }}
          tenant-id: ${{ secrets.AZUREAPPSERVICE_TENANTID_ }}
          subscription-id: ${{ secrets.AZUREAPPSERVICE_SUBSCRIPTIONID_ }}

      - name: 'Deploy to Azure Web App'
        id: deploy-to-webapp
        uses: azure/webapps-deploy@v2
        with:
          app-name: 'app-agent-web-test-centralus'
          package: ./build
Use your GitHub secrets for:
- client-id: ${{ secrets.AZUREAPPSERVICE_CLIENTID_ }}
- tenant-id: ${{ secrets.AZUREAPPSERVICE_TENANTID_ }}
- subscription-id: ${{ secrets.AZUREAPPSERVICE_ }}
How to Create an Environment File in a GitHub Action
The AI Travel Agent ReactJS web front-end necessitates a single environment variable, REACT_APP_API_HOST, to establish a connection with the back-end API.
| Environment Variable | Description |
|---|---|
| REACT_APP_API_HOST | Url to our Python FastAPI Azure Web App – deployed above. |
As our ReactJS web application is currently unable to make use of the Environment variables specified under the Azure Web App Settings, we can opt to create the environment file required in our GitHub Action. While not employed during this step for the sake of the tutorial, it is also possible to ‘hide’ the API URL in the workflow file using GitHub secrets.
Extracted from workflow file above: Build step to create .env file – main_app-agent-web-test-centralus.yml
- name: Make envfile
        uses: SpicyPizza/create-envfile@v2.0
        with:
          envkey_DEBUG: false
          envkey_REACT_APP_API_HOST: "https://app-agent-api-test-centralus.azurewebsites.net"
          fail_on_empty: true
          directory: web/
          file_name: .env
After making modifications to the workflow yml file, it is essential to commit the changes to the workflow file. Subsequently, we will proceed to initiate our workflow directly from our Azure Web App.
- Navigate to Deployment Center under Deployment
- Click Sync on the top.
- Select Ok to redeploy
Navigate back to the GitHub Actions section within your forked repository, where you will find your deployment process in progress.

Verifying AI Travel Agent Front-End Deployment on Azure Web App
Once the GitHub workflow has concluded, the deployment of the AI Travel Agent web front-end can be verified by accessing the Azure Web App endpoint. To do this, one simply needs to click on the default domain found in the Overview section – mirroring the process used to verify the Python FastAPI deployment.

Conclusion
Deploying the AI Travel Agent with Azure App Service demonstrates the ease and efficiency of using Azure’s comprehensive cloud platform. By integrating LangChain, Azure Cosmos DB for MongoDB, and Azure App Service, you can build and deploy sophisticated AI applications with robust scalability, security, and seamless DevOps capabilities. This tutorial showcased how to leverage GitHub Actions for continuous integration, ensuring a streamlined deployment process. With Azure App Service, you can confidently host and manage your AI-driven applications, providing reliable and scalable solutions for your users. Explore the potential of Azure’s ecosystem to enhance your application deployment and management strategies.

Leave a reply to Creating Intelligent Systems for Jira with Azure OpenAI and AI Search – Stochastic Coder Cancel reply